We now hold a licence for the cloud version of H5P, for the creation of interactive learning experiences.
The LMS H5P Plugin will be removed in due course, to help the transition to H5P.com
What does it mean for me?
This means that as a unit coordinator or content creator, H5P activities will now need to be made using the H5P.com cloud version rather than the LMS Plugin.
There is no change in how you create the H5P artefacts, just where you go to do this.
We are working on single sign on (SSO), but until then you only need to create an H5P.com account the first time you use it, and this is done via the LMS.
What do I do?
Here are some instructions on:
- Setting up your H5P.com account
- Creating artefacts in H5P.com
- Naming conventions
- Sharing artefacts
- Uploading artefacts from the LMS content bank to H5P.com
Creating your H5P.com account
Follow this process the first time to create your account.
- To first create a H5P.com account select add an external tool in a Moodle unit and select H5P
- Once taken to H5P.com use your UNE email and for first instances select a password
- In H5P.com you will access to your own folder – My Content – is private to you. There is also a folder for content shared with you – Shared with me.
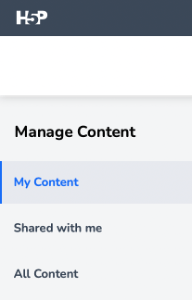
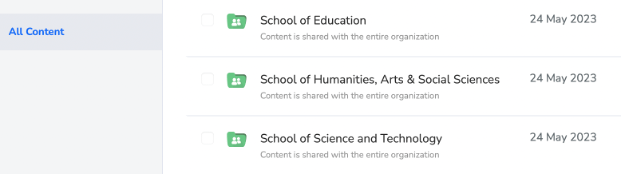
School folders can be located via the All Content tab
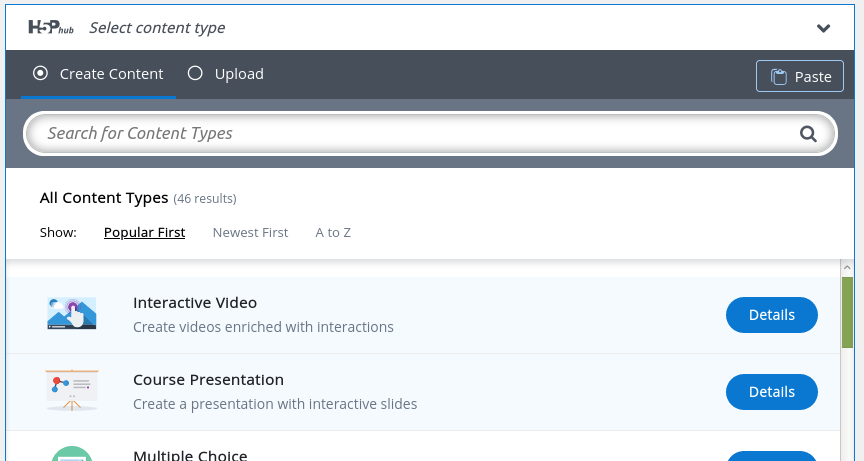
Creating artefacts
- Select add an External tool in the unit
- From the dropdown menu select Interactive Content H5P
- Select the School Folder relevant to the unit where you are creating the artefact
- Select + Add Content tab to create a new artefact
Naming conventions
- Begin title to H5P artefact with the unit code – this will help identity the artefact.
- You may also want to include the Topic/module in the naming if this will enable ease of location. For example, EDUC301_Topic3_Health Education_ Nutrition Check
Sharing artefacts
- Share the artefact with necessary people on creation of the resources (LD’s will need to share artefacts with the UC)
- Use Clone as the option for adding to the Unit site. (When you clone an artefact if you make changes in the cloned version these changes will not show in the original and vice versa. The clone acts as an unlinked copy of the artefact).
Uploading artefacts
You can upload existing artefacts that are already stored in the LMS content bank.
First you need to Backup the selected artefact in the content bank:
- View the specific H5P activity from the unit that you wish to upload
- On the cog icon select Backup
- Untick any Backup data you do not need. In my test I only selected the final box Include content bank content
- Select Next
- You should see the title of the H5P activity you are downloading – select Next
- Check the view of backup settings. if correct select Perform Backup
- Save downloaded file
Upload files to H5P.com
- Log into H5P.com: https://h5p.com
- Select the relevant school folder.
- Select + Add Content
- Select Upload button
- Select the file to upload – this will the backup file that you have downloaded from the Content Bank.
- The Uploaded file will show in the My Content Folder
- From here you can move it to the required School Folder.
- Rename the file as required using naming conventions identified
We will continue to monitor and refine processes as we progress use of H5P.com and send updates as needed. You can also visit Teaching Online@ UNE for additional information on H5P.
Image attribution: Maupao70 (2021).CC BY-SA 4.0
The instructions on how to get to the h5p website and login aren’t helpful. The best I can do is start a 30-day free trial
HI Jane
Thank you for the comment. I have also sent you a personal email in response.
Please can I confirm that you followed the following process for setting up your H5P.com account?
– To first create a H5P.com account select add an external tool in a Moodle unit and select H5P. You will then be taken to H5P.com
– Once taken to H5P.com use your UNE email and for first instances select a password.
Thanks Nic